If you want to move your Windows 10 Boot Camp partition from one Mac to another, or simply to make a backup, then I hope this guide will help you! Please start by taking backups of all your data - both Mac and your Windows installation - and store these backups some place safe while you work. We will use open source and other utilities already installed on your mac - dd, hdiutil, and Disk Utility.
I do not wish to be held responsible for any loss and, while this procedure worked for me, I never claim to be an expert at anything unless I am getting paid. I tested this process on macOS Sierra 10.12.3. First, open up Disk Utility in your original Mac with a Boot Camp partition. You will need enough space to backup all the files so double check you have enough disk space in the location you plan to save this backup. The size of your backup will be identical to the partition capacity (not used) - so plan ahead! You will want to take an image of your BOOTCAMP partition. Right click on the partition and select “Image From …” and save this file to anywhere on your mac. The default save options are fine. This process may take a few minutes. Copy this file over to the new machine.
Here is the trick - pay attention! The dmg backup file that you generated cannot be directly restored by Disk Utility on the new machine. If you naively try to restore this file, Disk Utility will fail and show the following error about an “Could not restore - Invalid Argument.” I tried many free demos of NTFS utilities to try to format a drive, etc - none of the free solutions worked.
[caption id=”attachment_25” align=”aligncenter” width=”300”] Could not restore - invalid argument[/caption]
However, in Mac thanks to its linux support there is a very powerful (read: extremely dangerous) utility called “dd” which copies data byte by byte rather than how most copy operations work “file by file.” Our backup is in a “file by file” format. We need to convert the dmg backup you took into a “byte by byte” format that the “dd” utility can use.
We will use hdiutil to convert your dmg image. Open up “Terminal” and run the following command (type in your login password when it asks):
hdiutil convert -format UDTO -o BOOTCAMP.img BOOTCAMP.dmg
[caption id=”attachment_26” align=”aligncenter” width=”525”] hdiutil convert boot camp[/caption]
You will need to prepare your new Mac for Boot Camp The easiest and safest way I could find was to install a new copy of Windows 10 and then effectively overwrite your backup on top of it. I did not test other ways.
To do this process you will need to run Boot Camp on your new mac and reinstall Windows 10. You do not even need a valid product key. Do not spend any time setting it up because we are just going to overwrite it once we are complete. You can download the Windows 10 image for free from here: https://www.microsoft.com/en-us/software-download/windows10
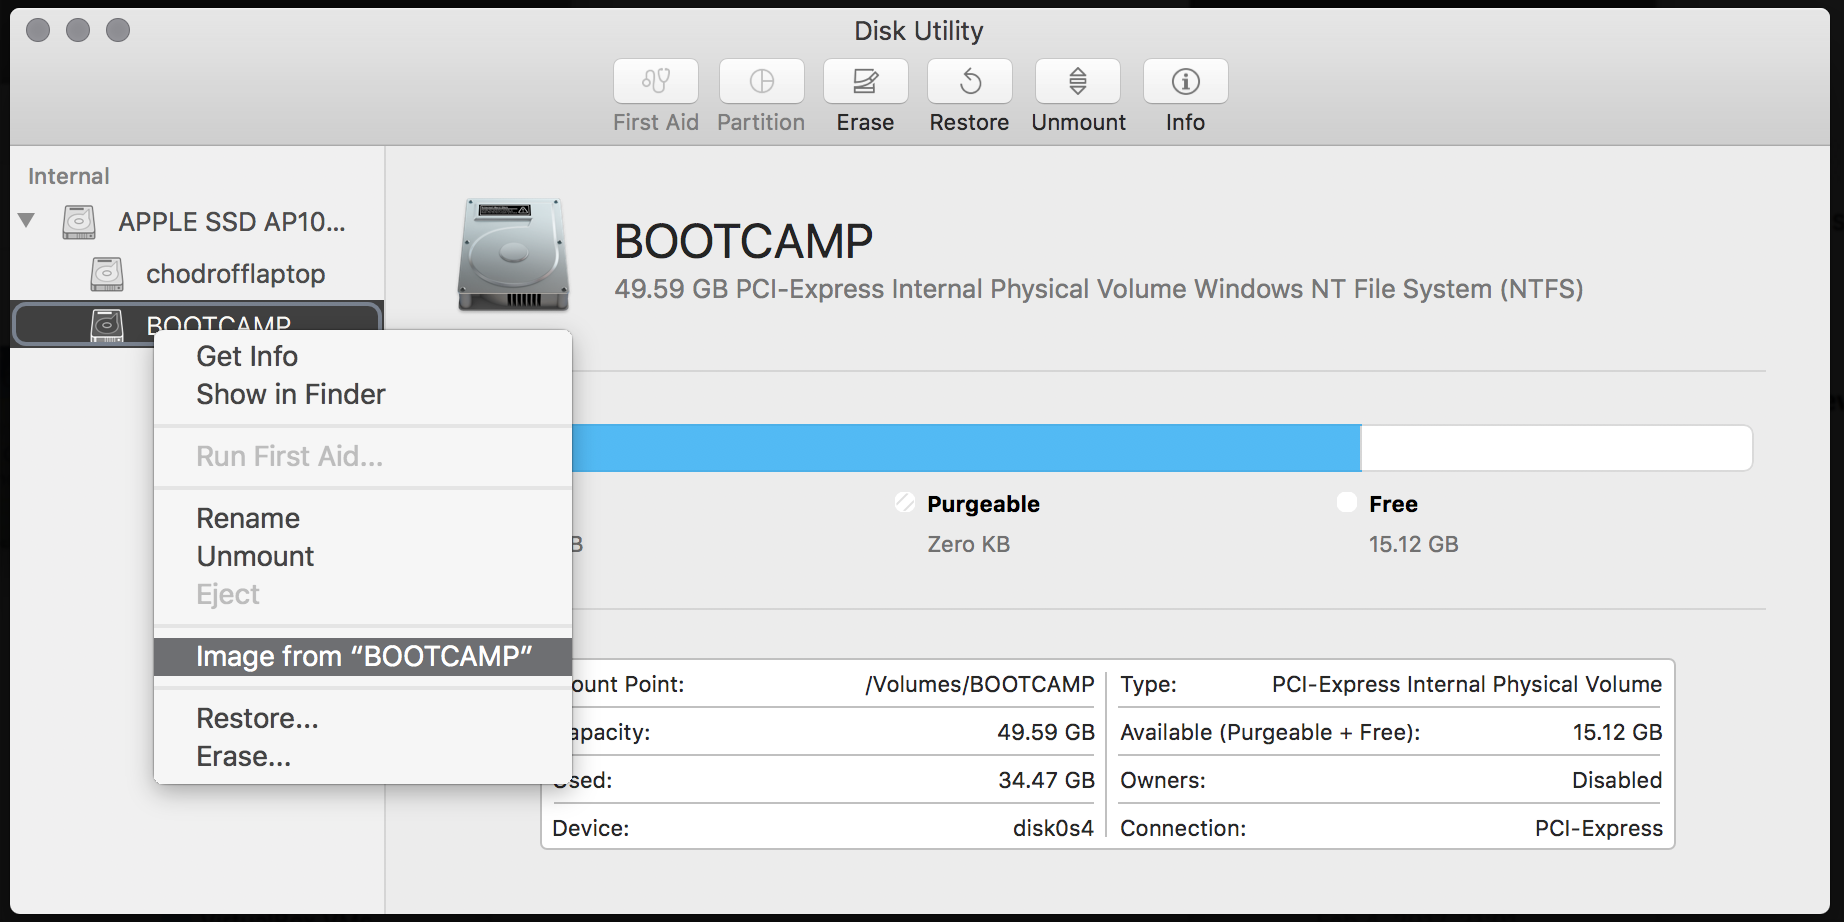
Now that you have a fully functional blank Boot Camp install, boot your new MacOS up and open up your Disk Utility. Right click on your Boot Camp partition and select “Get Info”. We need to see the disk name. Be very careful to ensure you are 100% positive you have the correct disk, or else you may lose all your data on a different device. Here is a screenshot of my BOOTCAMP disk. We need to look for the “disk0s4” which means BOOTCAMP is on /dev/rdisk0s4. Notice the “r” in front of that disk - it’s not in this picture.

Open up “Terminal” on your new mac. We are ready to restore your converted backup image using “dd” by overwriting your new Boot Camp partition with your backup disk.img.cdr file that you generated. Again, be very, very careful that you have correctly entered the correct disk – this command can easily wipe out data! Again, note how the disk device has a “r” in front of it.
sudo dd bs=1m if=BOOTCAMP.img of=/dev/rdisk0s4
[caption id=”attachment_28” align=”aligncenter” width=”525”] dd disk restore[/caption]
This may take a few minutes to complete and it is silent while it performs its magic. Once it does so successfully you are done! You may restart your new computer, press the “Option + R” keys while booting, select your Windows Boot Camp partition, and you should see your restored installation working.
Comments are appreciated. If I made any mistakes or you still have questions, please let me know. If this guide works for you please pay it forward.